Having a Facebook account as a clergy person and also as anyone else who works closely with the public is fraught with all sorts of etiquette and safety problems. I have a lot of teacher friends on Facebook that have recently changed their name to a nickname so that they can’t be easily found by parents wanting to cause trouble. Many clergy struggle with getting friend requests from parishioners – it feels mean to say ‘no’ to a friend request but we clergy also have a private life that we don’t necessarily want to share with everyone in church. Lots of people have different ways of dealing with this, here is what some people I know do:
- Don’t be on Facebook at all
- Never accept a friend request from a parishioner
- Create two Facebook profiles – one for the vicar and one for the person behind closed doors
The problem with these, for me at least, is that you miss out from sharing what’s going on at church with a wide group of people (although I would of course recommend you have a Facebook page for your church). Also, Facebook can be a place where you can offer pastoral support and maybe only even find out that someone is struggling because they’ve posted something on Facebook (but said they were fine at the church door on Sunday). Running two profiles is quite fiddly and there is always the potential for mixing them up – although I know some people who find this the best way to deal with these dilemmas.
My solution is to use Friend Lists.
I have created a list of Friends that are people that I’m willing to be friends with on Facebook but with whom I don’t share everything. This way I can post things I’m happy for people to know about – such as a coffee morning at church, and hide things like a picture of me and my husband at an anniversary meal.
- Go to Home when logged in to Facebook.
- Click Friend Lists under Explore on the left side of your News Feed.
- Click Create List.
- Enter a name for your list and the names of friends you’d like to add. Keep in mind you can add or remove friends from your lists at any time.
- Click Create.
Once you have done that, when you create a new post in Facebook, you can select the audience the post is to be shared with:

So in this image above I have set this post to Friends except – the list called ‘Church Restricted’. So anyone on that list wouldn’t see that umpteenth post about how brilliant Game of Thrones was last night!
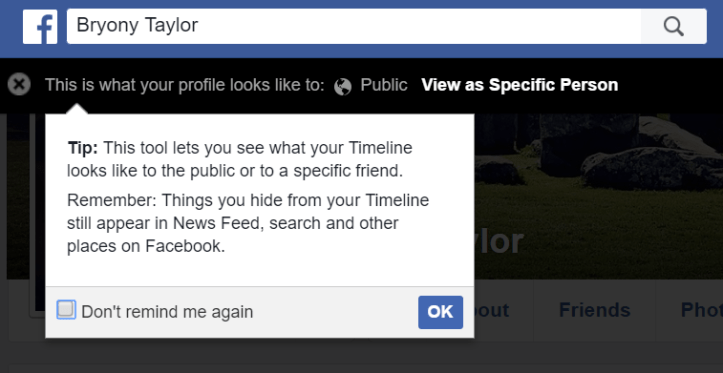
If you’re unsure if this has worked once you’ve set it up, you can at any time see what your Facebook profile looks like to the general public or to a specific person by clicking on your profile page next to where it says ‘view activity log’ and then clicking on ‘view as’:

Then it will take you to this page and you can view as the Public or as a specific person.
This is really useful and helps you to see if you might have over-shared! You can always go back and remove particular posts – just click on the tiny v in the top right of any post to edit or remove a post or to change the audience:

